
Shrubs
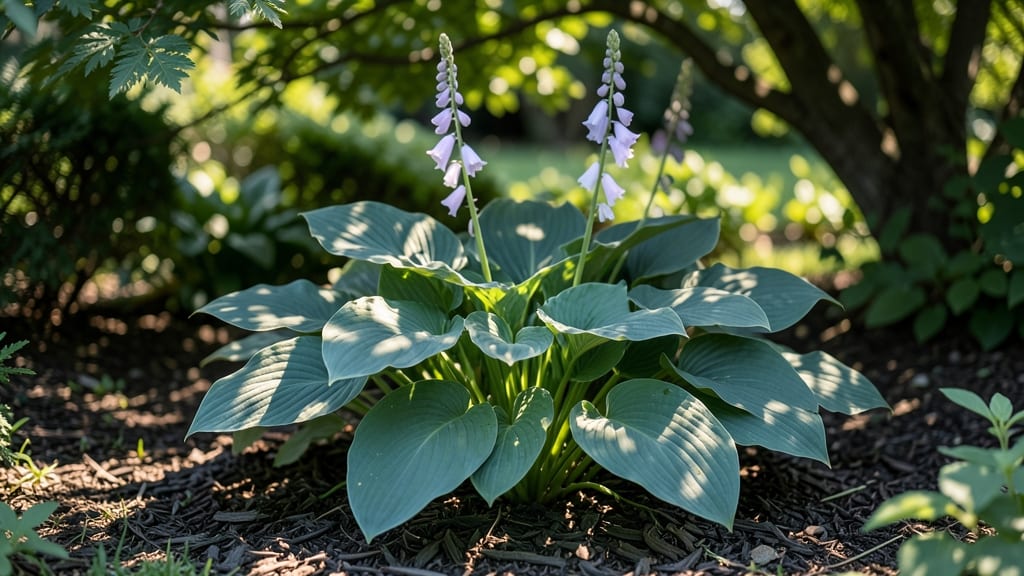
Sun and shade plants create the perfect layered garden—where every corner feels intentional. 🌿 I learned this after struggling with a shady backyard that looked like a forgotten corner until I matched plants to their light needs. The right combination turns dark spots into lush, vibrant spaces that actually thrive.
Start by mapping your garden’s light zones: full sun (6+ hours), partial shade (3-6 hours), and full shade (less than 3 hours). My go-to shade lovers include hostas, ferns, and astilbes, while sun lovers like coneflowers and daylilies take center stage in brighter areas.
The key? Grouping plants with similar needs together for a cohesive look.
You’ll end up with a garden that feels alive year-round—fragrant foliage in shady spots and bold blooms where the sun hits. Adding hardscape elements like trellises or stone paths can also help direct light where it’s needed most. The result? A space that’s both beautiful and functional.
This approach works for any yard size, from small urban patches to sprawling suburban gardens. Let’s bring that dark corner to life with plants that love the conditions you have.
📚 In This Guide
- What you need
- Instructions
- Tips and common mistakes
- Wrapping up and next steps
What you need
- ● Sun-and-shade plants: 1–3 Hosta (e.g., 'Blue Angel' or 'Francee') – for bold foliage
- ● 1 Ferns (e.g., Matteuccia struthiopteris) – for texture
- ● 1–2 Heuchera (e.g., 'Palace Purple') – for color contrast
- ● 1 Astilbe (e.g., 'Fanal') – for delicate blooms
- ● 1 Japanese Painted Fern (Athyrium niponicum) – for elegance
- ● Soil amendments: 5–10 lbs peat moss or coconut coir – for moisture retention
- ● 5 lbs compost – for nutrients
- ● 1–2 lbs perlite or sand – for drainage
- ● Tools: 1 garden trowel – for planting
- ● 1 pruning shears – for shaping
- ● 1 garden hose or watering can – for hydration
- ● 1 mulch (pine bark or shredded leaves) – 2–3 inches thick
- ● 1 slow-release fertilizer (e.g., Osmoote) – for long-term growth
- ● 1–2 decorative stones or mulch rings – for a polished look
- ● 1 pH testing kit – to ensure soil is slightly acidic (6.0–6.5)
- ● 1 shade cloth (30–50%) – for transition zones
How to design a sun-and-shade layered garden
Here's how to transform dark corners into thriving, textured plant layers that shine in every light.
🌿 Step 1: Map Your Sunlight Patterns
Start by observing your space for at least a week. Note where sunlight hits at different times—morning light is cooler and gentler, while afternoon sun is intense. I always mark my garden with stakes at the 4-foot, 6-foot, and 8-foot levels to track how shadows shift. This ensures I place sun-lovers where they'll thrive and shade-tolerant plants where they won't scorch.
Use a simple sunlight chart: shade (0-2 hours), partial shade (2-6 hours), and full shade (6+ hours of indirect light). Most gardens have microclimates—a spot might get morning sun but stay shaded by a tree all afternoon. This is where layering works its magic: tall plants cast their own shade for smaller ones below.
☀️ Step 2: Choose Plants for Each Light Layer
For full sun areas (6+ hours direct light), select drought-tolerant perennials like black-eyed Susans, daylilies, or coneflowers. These plants handle heat and dry soil once established. In partial shade (2-6 hours), opt for hostas, astilbes, or ferns—they appreciate morning sun but need afternoon relief. For full shade (0-2 hours), go for heucheras, lungwort, or Japanese painted ferns—these thrive where others wilt.
I like to group plants by their height and sunlight needs in vertical layers. Start with 6-foot tall sun-lovers at the back, then add 3-foot partial-shade plants in the middle, and finish with 1-foot shade-tolerant ground covers in front. This creates natural transitions and prevents one plant from stealing all the light from another.
🪴 Step 3: Plant in Staggered Depths for Texture
Dig holes twice as wide as the root ball but only as deep as the container. This prevents burying stems too deeply, which can cause rot. I always loosen the roots of container-grown plants before placing them in the hole—this encourages them to spread into the new soil. For each plant, add a handful of compost to the bottom of the hole to give it a nutrient boost right away.
Space taller plants 18-24 inches apart to allow airflow and prevent disease. Smaller perennials can go 12-18 inches apart, while ground covers like ajuga or creeping thyme should be planted 9-12 inches apart to fill in quickly. Mulch with 2-3 inches of shredded bark to retain moisture and suppress weeds—just keep it 2 inches away from stems to avoid rot.
💧 Step 4: Water Deeply and Adjust for Light Conditions
Water deeply once a week for the first month to encourage strong root growth. In full sun, you may need to water twice a week during dry spells, while shade plants often need less frequent watering. The key is to check the top 2 inches of soil—if it feels dry, it's time to water. Overwatering in shade can lead to root rot, so always let the soil dry slightly between waterings.
I use a soaker hose for even moisture distribution, especially in layered plantings. Run it for 20-30 minutes in the morning so plants have time to dry out during the day. Avoid overhead watering, which can spread fungal diseases. Within 4-6 weeks, you'll see new growth signaling that your plants are settling into their new home.
✂️ Step 5: Prune and Maintain Seasonal Balance
In early spring, cut back any dead foliage from the previous year but leave 2-3 inches of stem—this protects emerging buds. For summer, deadhead spent blooms on sun-loving perennials like coneflowers or black-eyed Susans to encourage more flowers. In fall, reduce watering gradually as temperatures drop, and apply a 2-inch layer of mulch to insulate roots over winter.
Every 2-3 years, divide overcrowded perennials in early spring before new growth appears. Dig up clumps, separate into smaller sections with 3-5 leaves each, and replant. This rejuvenates plants and gives you free material to share or expand your garden. With this layered approach, your dark corners will become lush, dynamic spaces that change with the seasons.
Tips & tricks for perfect sun-and-shade layered gardens
Here's what nobody tells you about making your layered garden truly thrive.
Light Layering Secret: In Step 1, when mapping sunlight, I recommend adding a 12-foot stake to your measurements—this helps track how shadows extend from tall structures like fences or trees. The key is noticing how shadows move throughout the day, not just at noon. Morning sun often creates cooler microclimates perfect for shade plants, while afternoon sun can scorch even partial-shade varieties. This extra measurement helps you visualize the full light spectrum your garden experiences.
Plant Height Strategy: When arranging your vertical layers in Step 2, I've found that adding a 1-foot buffer zone between height tiers prevents taller plants from completely overshadowing shorter ones. For example, place your 6-foot sun-lovers 12 inches back from where you'd normally position them. This creates dappled light patterns that smaller plants actually thrive in, rather than creating harsh shadow lines that can stress delicate foliage.
Root Health Hack: In Step 3, before planting, I always soak container-grown plants in water for 10-15 minutes to hydrate their root balls thoroughly. This helps prevent transplant shock and ensures the roots spread properly into your prepared holes. For plants with particularly dense root systems like hostas, I gently tease apart any circling roots before placing them in the soil—this encourages outward growth rather than creating root-bound plants that struggle to establish.
Watering Wisdom: For Step 4's watering schedule, I've developed a simple soil test: stick your finger 2 inches deep into the soil. If it feels dry at that depth, it's time to water. This method works better than checking surface moisture because it tells you what the roots actually experience. In shade areas, I often find the soil stays moist longer than expected—this is why I reduce watering frequency there, even when surface soil appears dry.
Pro Tips for Sun And Shade
- Here's what nobody tells you about making your layered garden truly thrive.
- Light Layering Secret: In Step 1, when mapping sunlight, I recommend adding a 12-foot stake to your measurements—this...
- Plant Height Strategy: When arranging your vertical layers in Step 2, I've found that adding a 1-foot buffer zone bet...
Frequently asked questions
Got questions about sun and shade plants? You're not alone!
Here are some of the most common inquiries—and their answers—to help you create a thriving layered garden in those tricky dark corners.
What’s the best way to test my garden’s sunlight levels?
Use a simple sunlight audit! Observe your space for a full day: mark areas with <6 hours of light (shade), 6–8 hours (partial shade), and full sun (8+ hours). Apps like Sun Surveyor can automate this. Pro tip: Avoid relying on summer sun—winter light is often weaker and more revealing!
Can I mix sun-loving and shade-tolerant plants together?
Layering is key—place sun plants (like hostas or ferns) in brighter edges and shade-tolerant shrubs (e.g., Hydrangea or Heuchera) deeper in. Just avoid pairing full-sun drought lovers (like lavender) with moisture-loving shade plants (like Caladium) without adjusting watering.
How long does it take for shade plants to establish?
Most shade-loving shrubs take 1–2 years to fully root and fill out, but slower growers (like Japanese maples) may need 3+ years. Troubleshooting: If leaves yellow after planting, check for overwatering or root shock. Mulch helps retain moisture and speed up establishment!
Do shade plants need extra care during droughts?
Yes! While they tolerate less sun, shade plants still need consistent moisture, especially in containers. Alternatives: Use self-watering pots or soaker hoses for deep roots. Group plants with similar water needs to simplify care.
What if my shade plant starts looking leggy or sparse?
Leggy growth often means too little light or overcrowding. Try pruning to encourage bushier habits or rotate containers to expose all sides to light. For sparse foliage, fertilize lightly with acidic, slow-release granules (like 10-10-10) in spring.
| Quick Fixes | When to Use |
|---|---|
| Prune leggy stems by 1/3 | Spring or early summer |
| Move to brighter spot (but avoid full sun) | Gradually over 2–3 weeks |
| Add mulch (2–3 inches) | Year-round for moisture retention |
Wrapping up and next steps
Transforming shady garden corners into lush, vibrant spaces is easier than you think! By embracing sun and shade plants, you’re not just filling gaps—you’re creating a layered, dynamic oasis that thrives in every light condition.
Whether you’re a seasoned gardener or just starting, these plants offer low-maintenance beauty and resilience, proving that shade doesn’t mean sacrificing style.
Ready to take the next step? Start small—pick one or two plants from this guide, test them in your space, and watch your garden bloom with confidence! 🌿✨ Need a refresher? Dive back into our plant selection guide or sketch your dream shade garden today!