
Companion Plants
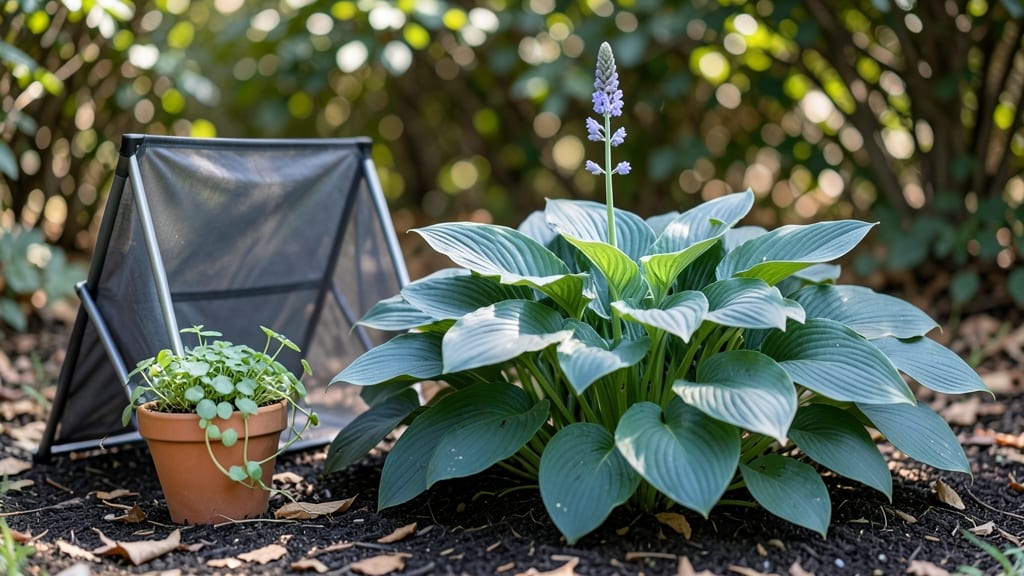
Creating a small sun shade for plants transforms struggling greens into thriving showstops—even in hot afternoons. 🌿 I’ve tested fabric shades, mesh screens, and DIY setups, and the right choice depends on your plants’ needs and your garden’s layout.
The key is balancing shade to prevent scorched leaves while still letting enough light for photosynthesis.
Start with lightweight, breathable materials like 30% shade cloth for delicate plants or 50% mesh for heat-tolerant varieties. For a polished look, pair shades with trellises or stakes, and position them to filter harsh midday sun while preserving morning light.
This setup keeps foliage vibrant and extends the growing season for heat-sensitive crops.
You’ll notice a difference within days: fewer crispy edges, more uniform growth, and plants that stay productive longer. The right shade also creates a microclimate that attracts beneficial insects while keeping pests at bay. Plus, it’s a stylish way to add structure to borders or protect prized specimens.
Works for container gardens, raised beds, or in-ground plantings—just adjust the material based on your plants’ sun tolerance. Whether you’re shielding lettuce, ferns, or young seedlings, this method keeps them lush without sacrificing sunlight entirely. Ready to try it?
📚 In This Guide
- What you need
- Instructions
- Tips and common mistakes
- Wrapping up and next steps
What you need
- ● Fabric or mesh: Lightweight, breathable material (e.g., shade cloth rated for 30-50% sun block or burlap for a rustic look). Size: Enough to cover your plant’s canopy (e.g., 12"x12" for small pots, 24"x24" for larger plants).
- ● Support structure: Option 1: Wooden dowels, bamboo stakes, or 4-6 small wooden sticks (½" diameter, 12-18" long).
- ● Option 2: A miniature hoop (e.g., embroidery hoop, 6-12" diameter) or flexible wire (18-24" long, 16-gauge).
- ● Fasteners: 4-6 mini binder clips, clothespins, or twist ties (for securing fabric to stakes).
- ○ Optional: Hot glue gun (for permanent fabric attachment).
- ● Scissors or fabric shears: For cutting fabric/mesh to size.
- ● Measuring tape or ruler: To ensure your shade fits snugly.
- ● Decorative elements: Ribbon, lace, or painted wooden accents for a garden-chic touch.
- ● Adjustable clips: Alligator clips for easy shade height changes.
- ● Waterproof sealant: Spray (e.g., Mod Podge Outdoor) to protect fabric from rain.
- ● Reflective material: Aluminum foil or mylar (for extra heat deflection in hot climates).
Step-by-Step guide to creating a partial light haven for sun-shade loving plants
Here's how to craft a thriving microclimate where delicate greens flourish under gentle shade.
🌿 Step 1: Select the Perfect Shade Structure
Choose a 50-70% shade cloth for your structure—this range blocks just enough harsh sunlight while allowing beneficial diffuse light. I prefer freestanding fabric frames or retractable awnings because they're adjustable as seasons change. For containers, use louvered shade umbrellas that let you control light exposure by angle.
Position your structure where plants receive morning sun but afternoon shade—this mimics natural forest understory conditions. Watch for leaf scorch (brown crispy edges) as a sign of too much direct light, which means your shade needs adjusting. A north-facing wall with afternoon shade works beautifully in most climates.
☀️ Step 2: Choose the Right Plants for Your Light Conditions
For partial shade gardens, prioritize plants that thrive in 3-6 hours of filtered light daily. My go-to shade-tolerant greens include Swiss chard, kale, spinach, and lettuce varieties like 'Buttercrunch' or 'Oakleaf'. These handle dappled sunlight beautifully while producing lush, tender growth.
Add textural contrast with shade-loving perennials like hostas, ferns, and astilbes—they'll anchor your space while providing long-term interest. Avoid sun-lovers like tomatoes or peppers here; they'll bolt or wilt under insufficient light. Check plant tags for light requirements—some labeled "partial shade" actually need more sun than others.
🪴 Step 3: Prepare the Soil for Shade-Grown Greens
Shade plants need rich, moist, well-draining soil that retains nutrients better than sunny beds. Amend your existing soil with 2-3 inches of compost and a handful of worm castings per square foot. I like to mix in 1 cup of balanced organic fertilizer (10-10-10) per 100 square feet to give shade plants the nutrients they crave.
Test your soil's moisture retention—press a handful and it should hold together but not be sticky. If it crumbles, add peat moss or coconut coir to improve water retention. Mulch with 2 inches of shredded leaves or straw to keep roots cool and conserve moisture, which is critical in shaded areas where evaporation slows.
💧 Step 4: Establish a Watering Routine for Shade Plants
Shade gardens stay moist longer, but that doesn't mean they need less attention. Water deeply 2-3 times per week, aiming for 1 inch of water per week—more in extreme heat. I use a soaker hose or drip irrigation to deliver water directly to roots without wetting foliage, which prevents fungal diseases like powdery mildew.
Check moisture by feeling the top 2 inches of soil—if it's dry, it's time to water. Shade plants often show stress through yellowing leaves before wilting, so monitor closely. In containers, water when the soil feels dry to the touch—small pots dry out faster than garden beds, even in shade.
✂️ Step 5: Maintain and Adjust Through the Season
Every 4-6 weeks, check your shade structure's effectiveness by observing plant growth. If leaves look pale or stretched, increase shade slightly. If they develop dark spots or mold, reduce humidity by improving airflow. Adjust the shade cloth angle in spring and fall to match the sun's lower arc—what worked in summer may be too much shade in cooler months.
Harvest outer leaves first from greens like kale and chard to encourage bushier growth. Prune leggy stems back by one-third to promote compact, productive plants. This is also the time to rotate crops—if you grew lettuce in a spot, follow it with spinach or Swiss chard next season to prevent disease buildup in the soil.
Tips & tricks for creating the perfect partial light haven
Here's what nobody tells you about crafting an ideal shade environment for your delicate greens.
Shade Cloth Precision: When selecting your 50-70% shade cloth, remember that this percentage represents the amount of light blocked, not transmitted. A 50% cloth actually allows 50% of light through, which is perfect for creating that ideal dappled sunlight effect. For containers, consider removable shade umbrellas with adjustable angles—these let you fine-tune light exposure as the sun's position changes throughout the day. The key is finding that sweet spot where your plants get just enough light to thrive without getting stressed by too much intensity.
Plant Placement Strategy: In Step 1, when positioning your shade structure, pay special attention to the east-west orientation. Morning sun is generally less intense than afternoon sun, so you can often get away with slightly less shade in the morning. For maximum flexibility, use a shade cloth that can be easily adjusted—this lets you respond to changing weather patterns or seasonal sun shifts. I've found that plants placed under the eastern edge of the shade structure often grow more vigorously because they receive that gentle morning light boost.
Soil Moisture Management: The soil preparation in Step 3 is where many gardeners go wrong. While adding compost and worm castings is excellent, don't overlook the importance of proper moisture retention testing. Shade plants need consistently moist soil, but not soggy conditions. I recommend mixing in a handful of coconut coir with your peat moss—this improves water retention while preventing compaction. A simple moisture test is to press your thumb into the soil up to your first knuckle; if it feels dry, it's time to water.
Seasonal Shade Adjustments: The maintenance schedule in Step 5 is your opportunity to fine-tune your shade setup throughout the year. In spring and fall, when the sun follows a lower arc, you can actually reduce shade coverage by 10-20% compared to summer. I've seen gardeners make the mistake of keeping summer shade levels constant year-round, which can lead to leggy growth in cooler months. Consider using a shade cloth with removable sections so you can adjust coverage without buying multiple structures.
Pro Tips for Small Sun Shade For Plants
- Here's what nobody tells you about crafting an ideal shade environment for your delicate greens.
- Shade Cloth Precision: When selecting your 50-70% shade cloth, remember that this percentage represents the amount of...
- Plant Placement Strategy: In Step 1, when positioning your shade structure, pay special attention to the east-west or...
Frequently asked questions
Got questions about keeping your plants happy with a small sun shade? You’re not alone! Here are some of the most common concerns—and straightforward answers to help you create the perfect partial-light haven for your greens.
What size sun shade do I need for my small plants?
A small sun shade should be proportional to your plant’s canopy. For seedlings or compact herbs (like basil or parsley), a 6–12 inch diameter shade is ideal. Larger pots (12+ inches) may need a 14–18 inch shade. Measure your plant’s spread first—aim for 10–20% larger than its foliage to ensure full coverage without blocking airflow.
How long should I leave the shade on my plants?
Start with 4–6 hours of shade per day if your plants are transitioning from full sun (e.g., tomatoes or peppers). Gradually reduce shade time by 1–2 hours weekly until they acclimate to partial light. Monitor leaves—yellowing or wilting means too much shade; pale, leggy growth signals they need more light. Adjust based on your climate!
Can I reuse a small sun shade for different plants?
Just clean it between uses to prevent mold or pests. Rinse with soapy water, scrub off debris, and let it dry in the sun. Pro tip: Use a different shade for moisture-loving plants (like ferns) vs. drought-tolerant ones (like succulents) to avoid overwatering or dehydration issues. Rotate shades seasonally for even wear.
What if my plants still look stressed under the shade?
Stress signs (like brown tips or stunted growth) often mean the shade is too dense or the plant needs more light. Try these fixes:
- Thin the shade material (e.g., switch from 50% to 30% shade cloth).
- Move the shade to cast partial shade (e.g., place it on one side of the pot).
- Supplement with grow lights 10–12 hours/day if natural light is weak.
Are there DIY alternatives to a store-bought small sun shade?
Yes! Try these budget-friendly options:
Material
How to Use
White fabric or cheesecloth
Drape loosely over plants for light filtering (30–40% shade).
Cardboard or foam board
Cut into a dome shape and prop above plants for direct shade.
Bamboo or wooden sticks
Weave with shade cloth for a customizable frame.
Warning: Avoid plastic sheets—they trap heat and can scorch leaves!
Wrapping up and next steps
Creating a small sun shade for plants is a simple yet game-changing way to protect your greens from harsh sunlight while keeping them thriving. Whether you’re using lightweight fabric, DIY materials, or store-bought solutions, these shades offer flexibility, affordability, and ease of use—perfect for balconies, windowsills, or garden beds. 🌿
Now that you’re armed with the know-how, take the next step—grab your materials and craft your custom shade today! Watch your plants flourish under their new partial-light haven, and don’t forget to share your creations with fellow plant lovers. Happy gardening! 🌱✨