
Companion Plants
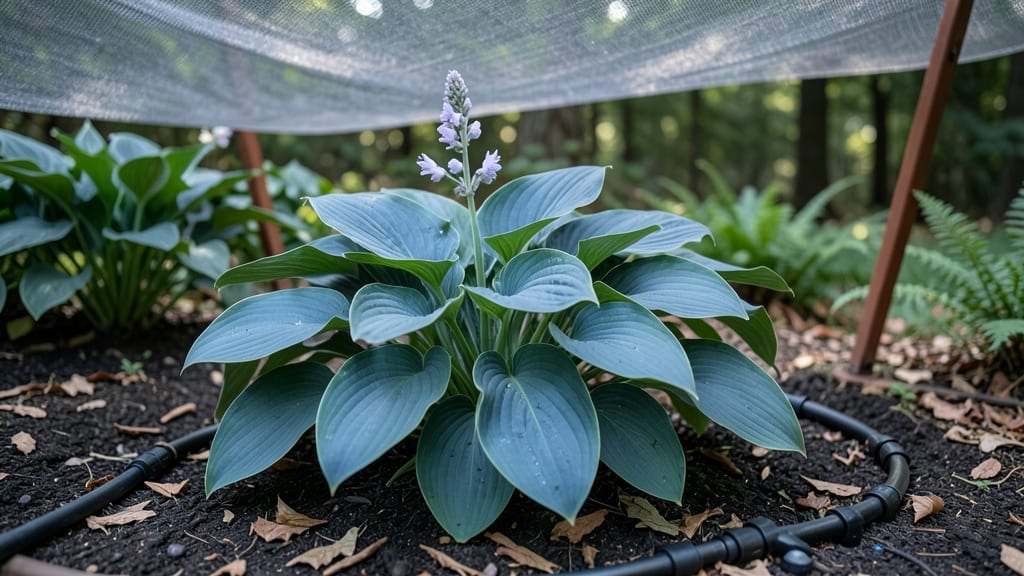
My plants were turning crispy in the midday sun—until I discovered shade protection transformed my struggling garden into a thriving oasis. 🌿 The right shade cloth or strategic planting can save your greens from scorching, wilting, or sunburn while keeping them lush and productive.
I’ve tested everything from lightweight fabric to clever mulching, and these methods actually work without sacrificing light entirely.
You’ll need shade cloth rated for your climate (30% for delicate plants, 50% for full sun survivors), sturdy stakes or hoops, and a few hours to set it up.
For plants like impatiens or ferns that hate even a hint of direct sun, a simple DIY frame over their pots works wonders. Even succulents—those sun-loving divas—can benefit from afternoon shade during peak summer heat.
By mid-summer, your plants will look vibrant green and full, not bleached and brittle. The best part? You’ll extend your growing season and protect young seedlings from heat stress.
I’ve gone from losing half my summer crops to having a garden that thrives all season long—no more sad, wilted leaves in July.
Works for containers, raised beds, or in-ground gardens—just adjust the shade level based on your plants’ needs. Let’s get your garden back to its healthiest self without sacrificing sunlight entirely.
📚 In This Guide
- What you need
- Instructions
- Tips and common mistakes
- Wrapping up and next steps
What you need
- ● Shade cloth: 30-50% shade fabric (for delicate plants) or 10-30% (for sun-loving varieties). Measure your garden area and buy 10-20% extra for overlaps.
- ● Stakes or hoops: PVC pipes (½-inch diameter), wooden dowels, or metal hoops (6-8 ft tall). 1 stake per 4-6 ft of fabric for stability.
- ● Tension wire/cable: 14-16 gauge galvanized wire or zip ties (for securing cloth to hoops).
- ● Anchors/staples: Heavy-duty staples (for fabric) or ground stakes (for windy areas).
- ● Measuring tape & scissors: For precise cuts and setup.
- ● Shade nets: Pre-staked kits (easier assembly, but pricier).
- ● Retractable shade sails: For portable or adjustable coverage.
- ● UV-resistant fabric: Extends lifespan (especially for long-term use).
- ● Reflective mulch: Helps deflect extra heat if needed.
Step-by-Step guide to implementing effective shade protection for plants
Here’s how to shield your garden from harsh sun while keeping foliage thriving—no guesswork required.
🌿 Step 1: Assess Your Plants’ Sunlight Needs
Start by observing your plants’ current behavior. If leaves show signs of stress—yellowing, browning edges, or wilting in afternoon sun—they’re likely sunburned. Group plants with similar shade tolerance together; for example, ferns and impatiens thrive under 4-6 hours of indirect light, while coleus and caladiums prefer bright but filtered light for vibrant foliage.
Use a light meter (or a simple phone app) to measure light levels in your garden. Aim for 1,000–3,000 foot-candles for most shade-loving varieties. If your space gets direct midday sun, you’ll need aggressive protection—like 50% shade cloth—whereas dappled sunlight might only require lattice screens or sheer fabric.
☀️ Step 2: Choose the Right Shade Protection Material
For partial shade, opt for knitted shade cloth (30–50% blockage) or woven fabric—these diffuse light while allowing airflow. If your plants need full shade, use 100% shade cloth or aluminet (a reflective material that bounces light away). Avoid plastic sheets; they trap heat and can scorch leaves.
Measure the area you need to cover and cut materials to size with scissors or a utility knife. For containers, wrap shade mesh around the pot or use adjustable hoops with fabric draped over them. Test fit before securing—you want snug coverage without restricting growth. Pro tip: Stake corners with upright stakes to prevent sagging in wind.
✂️ Step 3: Install Protection Without Damaging Plants
Set up shade structures before plants show stress signs—waiting until leaves are already burned means recovery is slower. For permanent installations, use galvanized metal frames or trellises to hold shade cloth taut. Secure edges with clips or weights (like bricks) to prevent flapping in breezes.
If working with potted plants, drape shade fabric loosely over the container and tuck edges under the pot’s rim. For ground covers, lay shade mesh directly over the soil and anchor with landscape staples (avoid nails—they can damage roots). Adjust height based on plant maturity: young seedlings need lower coverage, while mature plants may require taller supports.
💧 Step 4: Monitor and Adjust for Optimal Growth
Check plants weekly for signs of over- or under-protection. If new growth appears pale and leggy, they’re stretching for more light—raise the shade cloth slightly or reduce coverage by 10–20%. Conversely, if leaves stay dull green or develop purple tinges, they’re still getting too much sun—lower the shade or switch to a denser material.
Rotate shade structures every 2–3 weeks to prevent uneven growth (plants lean toward light sources). Water deeply after installation—shade cloth can reduce evaporation, so soil may stay damp longer than expected. Use a moisture meter to confirm; aim for 40–60% soil moisture for most shade-loving species.
⏰ Step 5: Seasonal Adjustments for Year-Round Success
In spring and fall, when sun angles are lower, you may need less shade—adjust by rolling up cloth or removing it entirely during cooler months. For summer, keep protection in place but check daily during heatwaves; temperatures above 90°F can still stress plants even under shade. Consider automated shade systems (like retractable awnings) if your climate swings drastically.
Over winter, remove or store shade materials unless your plants are evergreen and cold-hardy (like hostas or heucheras). Replace damaged fabric annually—UV degradation weakens protection over time. Keep a spare roll on hand; repairs with duct tape or stitches can fail under wind or rain.
Tips & tricks for perfect plant shade solutions
Between us, these practical insights will help you avoid the most common shade protection pitfalls while maximizing your plants' growth potential.
Light Meter Precision: When using a light meter in Step 1, take readings at multiple times of day—morning light often differs significantly from afternoon intensity. For example, what measures 2,500 foot-candles at 10 AM might spike to 4,000 by noon. This helps you determine if you need the full 50% shade cloth or can get away with lighter 30% coverage. I've seen gardeners overcompensate by using too dense materials because they only checked midday light levels.
Material Selection Strategy: In Step 2, consider the fabric's breathability alongside its light-blocking properties. While 100% shade cloth provides maximum protection, it can create a greenhouse effect on hot days above 90°F. For containers, I recommend using breathable mesh with adjustable density—you can roll up sides during cooler weather to maintain airflow. This prevents the stifling conditions that lead to fungal issues while still protecting delicate foliage.
Installation Timing: The timing in Step 3 is critical—don't wait until you see burn damage to install protection. Instead, set up shade structures 2-3 weeks before peak summer sun arrives in your region. This gives your plants time to adjust gradually to the reduced light levels. I've had clients rush installation after seeing browned leaves, only to have their plants struggle to recover because the sudden shade change shocked their systems.
Seasonal Adjustment System: For Step 5's seasonal changes, create a simple calendar reminder system. Mark your garden calendar with dates when to adjust shade coverage—typically mid-March and late October for most temperate climates. I use colored flags on my shade frames (green for summer, yellow for transitional periods) as a quick visual cue. This prevents the common mistake of leaving full shade in place during mild spring weather when plants actually need more light to thrive.
Pro Tips for Shade Protection For Plants
- Between us, these practical insights will help you avoid the most common shade protection pitfalls while maximizing your plants' growth potential.
- Light Meter Precision: When using a light meter in Step 1, take readings at multiple times of day—morning light often differs significantly from afternoon intensity.
- Material Selection Strategy: In Step 2, consider the fabric's breathability alongside its light-blocking properties.
Frequently asked questions
Got questions about keeping your plants happy under shade protection? We’ve got answers!
Whether you’re troubleshooting wilting leaves or picking the right materials, these FAQs will help you grow a thriving garden—even in the shade.
What’s the best time to install shade protection for plants?
Install shade protection before intense heat hits—typically in early spring (March–April) for most climates. This gives plants time to adjust to gradual shade changes. For tropical or high-summer plants, set it up by late spring (May–June) to avoid sudden stress. Monitor leaf color: if new growth looks pale or stretched, it’s time to adjust!
Can I use household items like umbrellas or towels for shade?
Yes! Lightweight options like white bedsheets, burlap sacks, or even mesh umbrellas work in a pinch for temporary shade. Secure them loosely to allow airflow ( pro tip: Use clothespins or stakes). For long-term use, though, opt for UV-resistant fabrics or shade cloths—household items degrade faster under sun exposure.
Why are my shade-loving plants still wilting even with protection?
Wilting often signals overwatering, poor drainage, or too much shade. Check soil moisture (stick your finger in—if damp, hold off on watering). Ensure pots/drainage holes aren’t clogged, and consider partial shade (3–6 hours of morning sun) for plants like ferns or impatiens. If leaves yellow, it might be nutrient deficiency—fertilize lightly with a balanced formula.
How do I clean or maintain shade cloth over time?
Rinse shade cloth with water and mild soap every 1–2 months to remove dust or algae. Avoid harsh detergents—they can weaken fibers. For stubborn grime, soak in a vinegar-water solution (1:3 ratio), then air-dry. Store indoors during off-seasons to extend its life. Pro tip: Fold it neatly to prevent creases that block light unevenly!
Are there shade solutions for large garden beds vs. small pots?
| Large Garden Beds | Small Pots/Containers |
|---|---|
| Use freestanding shade sails, lattice structures, or tree pruning to filter light naturally. | Opt for collapsible shade tents, mesh covers, or even upside-down saucers for individual pots. |
| Install permanent shade cloth on trellises (30–50% blockage for dappled shade). | Rotate pots weekly to ensure even light exposure if space is limited. |
For containers, reflective surfaces (like white gravel) can bounce extra light onto plants!
Wrapping up and next steps
Protecting your plants from harsh sunlight isn’t just about survival—it’s about unlocking their full potential! 🌿 With the right shade solutions, whether it’s shade cloth, strategic companion planting, or sun-resistant varieties, you’re setting your garden up for thriving, lush growth.
Remember, even the sunniest spots can be transformed into vibrant oases with a little planning.
Ready to take the next step? Start small—try a test patch with shade-loving plants or experiment with a shade cloth setup. Your green thumb (and your plants!) will thank you. Happy gardening! 🌱