
Light Requirements
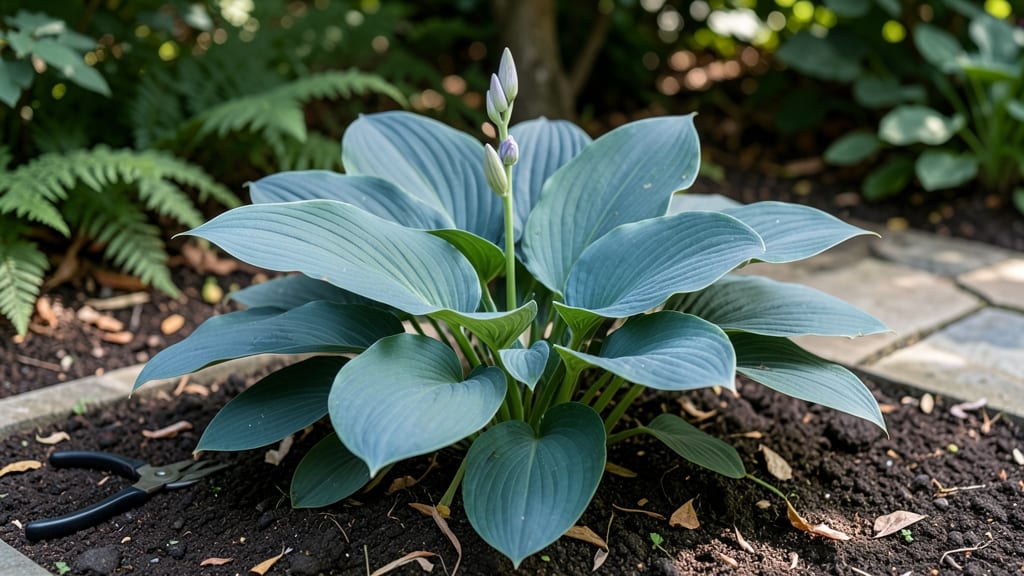
Shade-tolerant perennials turn dark corners into lush, year-round gardens. 🌿 I’ve transformed my north-facing yard from a patchy mess to a thriving green haven using plants that love shade—no special tricks, just the right choices.
The secret lies in selecting foliage that stays vibrant even when sunlight is scarce, creating a living tapestry that feels alive in every season.
These plants thrive where others struggle, with minimal fuss. Hostas offer bold textures, ferns add delicate fronds, and astilbes bring feathery plumes—all while demanding little more than consistent moisture and rich soil.
Perfect for under trees, along fences, or in woodland gardens, they create layers of interest that outshine even the sunniest borders. The best part? Many bloom in late summer when other gardens are fading.
You’ll end up with a garden that feels lush and intentional, not neglected. Imagine velvety hosta leaves, airy fern fronds, and tall astilbe plumes all working together to fill in empty spaces. These perennials also attract pollinators and support local ecosystems, making your shade garden both beautiful and beneficial.
Start small with a few favorites, then expand as you fall in love with their resilience.
Works in any shady spot—whether you’re dealing with dense tree canopies, a north-facing wall, or just a yard that gets overlooked. The key is matching plants to light levels and soil conditions, so your garden stays vibrant year after year. Let’s bring life to those shadowy corners!
📚 In This Guide
- What you need
- Instructions
- Tips and common mistakes
- Wrapping up and next steps
What you need
- ● Shade-tolerant perennial plants: 4–6 plants per variety (e.g., Hostas, Heucheras, Astilbes, Ferns, or Bleeding Hearts).
- ● Choose native or well-adapted species for your climate zone (check USDA Hardiness Zone maps!).
- ● High-quality potting soil or garden loam: 2–3 cubic feet (or 1–2 bags) enriched with compost or organic matter (improves drainage and fertility).
- ● Mulch: 2–3 inches of shredded bark, wood chips, or pine needles (retains moisture and regulates soil temp).
- ● Slow-release fertilizer: 10–20 lb bag (look for a balanced 10-10-10 or low-nitrogen 5-10-10 for shade plants).
- ● Garden trowel or transplant spade (for digging holes 2–3x wider than root balls).
- ● Garden gloves (to protect hands from thorns or rough foliage).
- ● Watering can or hose with a gentle spray nozzle (deep watering is key for shade plants!).
- ● Pruners or shears (for cleanup and shaping—sterilize with rubbing alcohol!).
- ● Measuring tape or ruler (to ensure proper spacing—most perennials need 12–36 inches apart).
- ● Soil pH test kit (shade plants often prefer slightly acidic to neutral soil (pH 6.0–7.0)).
- ● Epsom salt or iron supplement (if leaves show yellowing between veins, a sign of iron deficiency).
- ● Drip irrigation system (for consistent moisture in dry shade).
- ● Decorative stones or edging (to define plant beds and reduce weed competition).
How to select and plant shade-tolerant perennials for year-round interest
Here's the straightforward approach I use to fill shady spots with plants that stay vibrant from spring through winter.
🌱 Step 1: Choose Plants for Your Specific Light Conditions
First, identify your shade level—full shade (<3 hours sun) needs the toughest varieties like heuchera or hostas, while partial shade (3-6 hours sun) can handle astilbes or ferns. I always check the plant tag for light requirements, since "shade-tolerant" doesn't mean all plants thrive equally in darkness. For deep shadows, look for plants with large, dark leaves that naturally capture more light.
Group plants by their height and spread to create layers. Taller varieties like ligularia or foamflower go in the back, while ajuga or sweet woodruff work well as ground covers. This arrangement prevents leggy growth and ensures every spot gets some light exposure. I sketch a simple layout first to visualize how they'll fill the space over time.
🪴 Step 2: Prepare the Planting Site for Moisture Retention
Shade gardens stay damp longer, so improve drainage by amending the soil with 2-3 inches of compost mixed into the top 12 inches of soil. I add a handful of perlite or coarse sand to prevent compaction, which is especially important for plants like hostas that hate soggy roots. Test your soil's moisture by squeezing a handful—if it stays clumped, add more organic matter to help it drain.
For heavy clay soils, I create raised beds with 1-2 inches of wood chips or pine bark fines to improve aeration. This mimics the natural forest floor environment that many shade-loving perennials prefer. Mark planting spots with stakes or a garden hose laid out in your design to avoid digging multiple times.
☀️ Step 3: Plant at the Right Depth and Spacing
Dig holes twice as wide as the root ball but only as deep as the container's root level—planting too deep suffocates roots, while too shallow leaves them exposed. Gently loosen the roots if they're circling the pot, which happens often with nursery-grown plants. I like to add a handful of bone meal to the bottom of the hole for a phosphorus boost, especially for perennials that take time to establish.
Space plants according to their mature size—hostas need 18-24 inches apart, while ajuga can spread 24 inches wide but only needs 12 inches between plants. Press soil firmly around the roots to eliminate air pockets, then water deeply to settle everything. You'll see the soil surface settle slightly after watering—that's your cue to add a 1-inch layer of mulch.
💧 Step 4: Water and Mulch for Consistent Moisture
Water newly planted perennials deeply once a week for the first 4-6 weeks, or whenever the top 2 inches of soil feel dry. Use a soaker hose or drip irrigation to avoid wetting the leaves, which can cause fungal issues. I water in the morning so foliage dries quickly, reducing disease risk. Overhead watering in shade gardens often leads to yellowing leaves because the plants can't dry out fast enough.
Apply 3-4 inches of mulch around plants, keeping it 2 inches away from stems to prevent rot. I use shredded bark or leaf mold because they break down slowly and improve soil structure over time. This mulch layer helps regulate soil temperature and keeps roots consistently moist, which is especially important during dry spells when shade areas can still dry out.
⏰ Step 5: Maintain Through the Seasons
In spring, remove dead foliage from last season but leave any that still looks green—it provides nutrients as it decomposes. I fertilize lightly with a balanced 10-10-10 in early spring, then again in midsummer, but only if the plants show signs of slow growth. Shade-tolerant perennials often don't need much feeding because they grow slowly in low light.
Watch for signs of stress like yellowing leaves or stunted growth—these usually mean the plant needs more light or better drainage. Divide clump-forming perennials like hostas every 3-4 years in early spring to keep them vigorous. You'll know it's time when the center of the plant looks bare and the outer edges are dense. This rejuvenates the plant and gives you free divisions for other spots in your garden.
Tips & tricks for perfect shade garden plantings
These simple strategies will help you create a thriving shade garden that stays lush year-round without the guesswork.
Light Matching: Pay extra attention to the 3-6 hour partial shade distinction—this is where most shade plants struggle. If your spot gets morning sun but afternoon shade, opt for astilbes or ferns that tolerate this pattern. For true deep shade (<3 hours), heuchera and hostas are your best bets because they've evolved to capture minimal light efficiently. I always test my garden's light conditions by observing how nearby trees cast shadows throughout the day.
Soil Preparation Secret: The 2-3 inches of compost mixed into the top 12 inches of soil is non-negotiable for shade plants. I've learned the hard way that skipping this step leads to compacted soil that suffocates roots. For heavy clay soils, the 1-2 inches of wood chips in raised beds makes all the difference—it mimics the natural forest floor environment these plants evolved in. Pro tip: Mix in a handful of perlite with your compost to create tiny air pockets that prevent waterlogging.
Planting Depth Visual: When planting, imagine the root ball as a clock face—dig holes twice as wide but only as deep as the root level (about 12 o'clock). Planting too deep (below 12 o'clock) suffocates roots, while too shallow (above 12 o'clock) leaves them vulnerable. I always use a small stick to mark the original root level before removing plants from pots. For hostas, which need 18-24 inches apart, I sketch their mature spread on paper first to avoid overcrowding.
Mulch Layer Strategy: That 3-4 inches of mulch isn't just for looks—it's a moisture regulator and temperature insulator. I use shredded bark because it breaks down slowly, but in hotter climates, I switch to pine bark fines that retain moisture longer. The key is keeping mulch 2 inches away from stems to prevent rot. In my experience, properly mulched shade gardens need 30% less watering once established.
Pro Tips for Shade Tolerant Perennials
- These simple strategies will help you create a thriving shade garden that stays lush year-round without the guesswork.
- Light Matching: Pay extra attention to the 3-6 hour partial shade distinction—this is where most shade plants struggle.
- Soil Preparation Secret: The 2-3 inches of compost mixed into the top 12 inches of soil is non-negotiable for shade plants.
Frequently asked questions
Got questions about growing shade-tolerant perennials? You’re not alone! Here are some of the most common concerns—and straightforward answers to help you green-thumb your way to success.
What are the best shade-tolerant perennials for beginners?
Start with easy-care options like Hosta (for lush foliage), Heuchera (for vibrant colors), or Astilbe (for feathery plumes). These thrive in low light and require minimal fuss. For ground cover, try Lamium or Sweet Woodruff—both are forgiving and spread beautifully.
How long does it take for shade perennials to establish?
Most shade-tolerant perennials take 1–2 years to fully establish, though some like Ferns or Lungwort may show steady growth in their first season. Patience pays off—focus on consistent moisture (but avoid soggy soil) during their first year for the best root development.
Can shade perennials handle wet soil or dry shade?
Some thrive in moisture-retentive conditions (e.g., Carex sedge or Japanese Painted Fern), while others like Dryopteris ferns or Coral Bells tolerate drier shade. Amend heavy clay with compost and mulch to improve drainage. For dry shade, group plants with similar needs and water deeply but infrequently.
What’s the best way to revive struggling shade perennials?
Yellowing leaves? Check for overwatering (adjust to let soil dry slightly between waterings) or nutrient deficiencies (add a balanced fertilizer in spring). Leggy growth? They may need more light—try trimming competing branches or thinning nearby trees. Most perennials bounce back with proper care!
Are there shade perennials that bloom year-round?
While no perennials bloom truly year-round, some offer near-continuous interest: Hellebores (winter/early spring), Lungwort (spring), Coral Bells (summer), and Japanese Anemone (fall). Pair these with evergreen foliage (like Ivy or Boxwood) for a lush, ever-changing display.
Wrapping up and next steps
Shade-tolerant perennials are your secret weapon for transforming dim corners into lush, vibrant gardens—without sacrificing color or texture! 🌿 From the delicate blooms of heuchera to the bold foliage of hostas, these plants prove that shade isn’t a limitation but an opportunity.
With the right choices, you can enjoy year-round interest, low maintenance, and a garden that feels alive in every season.
Ready to dive in? Start small—pick one or two perennials that match your space and soil, then expand as you gain confidence. Before you know it, your shade garden will be the envy of the neighborhood! Grab your gloves and get growing!