
Tools
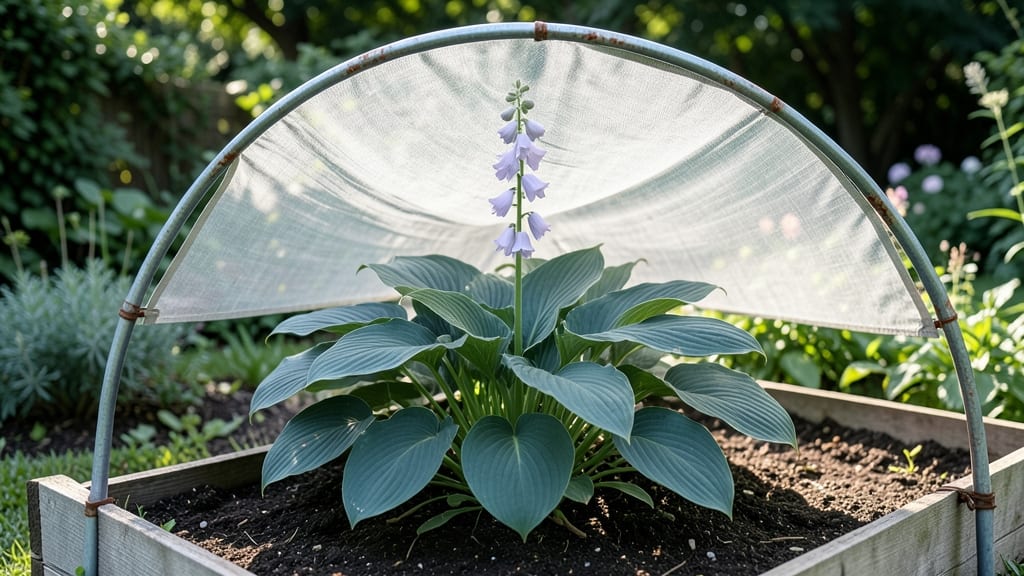
Shade fabric for plants saved my sun-scorched impatiens last summer. 🌿 The moment I draped that 30% shade cloth over their pots, the leaves stopped wilting and the flowers bloomed like crazy—proof that sometimes, plants need a little protection from too much sun.
It’s not just about saving delicate flowers; shade fabric also keeps soil moist longer, reduces heat stress, and even deters pests by making your garden less visible to flying insects.
Choosing the right percentage is everything—30% for shade-loving plants like ferns and hostas, 50% for tropicals that need bright but indirect light, and 70% or higher for succulents or seedlings in hot climates.
Installation is simple: just drape it over a frame or stakes, secure the edges with clips or weights, and adjust as the season changes. The best part? You can reuse it year after year if you clean it properly and store it when not in use.
With shade fabric, you’ll see healthier plants that grow stronger and produce more blooms or harvests. The fabric creates a microclimate where roots stay cooler, water evaporates slower, and even heat-sensitive veggies like lettuce thrive in summer.
Plus, it’s a game-changer for container gardens where soil heats up fast. Think of it as a lightweight, breathable umbrella for your plants—keeping them happy without smothering them.
Works for everything from patio pots to full garden beds, and it’s especially useful in hot climates or urban areas where shade is scarce. Just avoid heavy fabrics that trap too much moisture, and always secure it tightly to prevent flapping in wind. Your plants—and your water bill—will thank you.
📚 In This Guide
- What you need
- Instructions
- Tips and common mistakes
- Wrapping up and next steps
What you need
- ● Shade fabric: 30-50% block shade (for delicate plants) or 70-90% block (for full sun protection). Measure your area—buy 10-20% extra for overlaps and mistakes. Pro tip: 💡 Use UV-stabilized fabric to prevent fading!
- ● Measuring tape: 25-foot retractable tape for accuracy.
- ● Scissors or utility knife: Heavy-duty fabric scissors or a rotary cutter for clean cuts.
- ● Staple gun + heavy-duty staples: 1/4" galvanized staples to secure fabric to frames.
- ● Wooden dowels or PVC pipes: 1-2" diameter, cut to 8-foot lengths (adjust for height). Quantity: 2-4 per panel (depends on width).
- ● Corrugated plastic or bamboo stakes: 12-18" long, 1-2 stakes per dowel for stability.
- ● Zip ties or bungee cords: To temporarily hold fabric while stapling.
- ● Grommet kit: For pre-punched holes in fabric (if not using dowels).
- ● Decorative trim: Bias tape, hem tape, or fabric paint to customize edges.
- ● Plant clips or hooks: To hang lightweight pots from the fabric.
- ● Weatherproof sealant: For wooden dowels (if exposed to rain).
- ● Level: To ensure panels hang straight.
Step-by-Step instructions for creating a light-blocking privacy screen with shade fabric
Here's how I transform dark corners into lush, sun-controlled garden spaces using shade fabric.
🪴 Step 1: Measure and Cut Fabric to Size
Measure the area you want to shade—record the height and width of your garden corner or fence. For a 4-foot-tall screen, I cut fabric 1 foot wider than the measurement on both sides to allow for draping and securing. Use sharp fabric scissors to cut clean edges, and avoid stretching the fabric while measuring.
If you're covering an existing structure like a trellis or fence, measure around obstacles first. I mark measurements directly on the fabric with a fabric marker before cutting to ensure precision. For 50% shade fabric, you'll need about 1.5 times the square footage of your actual area to account for overlap and draping.
💧 Step 2: Choose and Install Support Structures
Decide on your support system—freestanding frames, existing fences, or garden stakes. For freestanding screens, I use PVC pipes or wooden dowels cut to your desired height. Assemble a frame by connecting pipes with corner brackets or by lashing wooden dowels together with zip ties. Secure the frame firmly in the ground with stakes or concrete anchors to prevent leaning.
If attaching to an existing fence, use staple guns or heavy-duty clips to avoid damaging the wood. For temporary setups, garden stakes work well—just space them every 3-4 feet along the fabric's edge. Avoid metal stakes in areas with heavy foot traffic, as they can bend over time.
☀️ Step 3: Attach Fabric to the Frame
Start by draping the fabric over the frame, allowing it to hang loosely for a natural look. Secure the top edge first using garden staples or zip ties, pulling the fabric taut but not stretched. For a clean finish, fold the top edge over once before securing it. Work your way down the frame, stapling or tying the fabric every 12-18 inches to keep it smooth and wrinkle-free.
If using a 50% shade fabric, leave some drape at the bottom to allow airflow and prevent heat buildup. For denser fabrics (70% or higher), consider adding ventilation holes near the top to reduce trapped heat. I always test the fabric's tension by gently pulling it—it should hold its shape but still allow for slight movement in the breeze.
✂️ Step 4: Secure Edges and Add Finishing Touches
Use landscape fabric pins or heavy-duty clips to secure the bottom edge of the fabric to the ground. For a polished look, bury the pins just enough to hide them while keeping the fabric in place. If you're covering a sloped area, drape the fabric loosely and secure it at multiple points to prevent pooling water.
Add decorative trim or bias tape along the top edge for a finished look, or leave it raw for a rustic feel. For extra durability, I reinforce the top edge with a strip of UV-resistant fabric before attaching it to the frame. This prevents fraying and extends the life of your shade screen.
🌿 Step 5: Monitor and Adjust for Plant Health
After installing, watch your plants for 2-3 weeks to see how they respond to the new shade levels. If leaves appear yellow or wilted, the fabric may be blocking too much light—consider using a lighter shade fabric (30-50%) instead. Conversely, if new growth is slow or leggy, the fabric might not be providing enough shade, and you may need a denser option (70% or higher).
Adjust the fabric's tension seasonally—loosen it slightly in summer to allow more airflow and tighten it in winter to block cold winds. I also check for fabric sagging after heavy rains and re-secure any loose areas. With proper care, a shade fabric screen can last 3-5 years, giving your plants the perfect balance of light and protection.
Tips & tricks for perfect light-blocking privacy screens
Here's what nobody tells you about making shade fabric screens that actually last and work beautifully.
Fabric Selection Matters: For a 4-foot-tall screen, choose shade fabric with a 50% block rating for most plants—this provides enough shade without stunting growth completely. If you're protecting delicate plants or creating a cozy seating area, opt for 70-80% block fabric instead. Always check the fabric's UV resistance rating too—higher UV protection means longer-lasting shade. I've found that polypropylene fabrics work best for outdoor durability.
Support Structure Stability: In Step 2, when installing your support system, don't skimp on securing the frame. For freestanding screens, use concrete anchors rather than just stakes—they prevent leaning in windy conditions. If attaching to a fence, pre-drill holes to avoid splitting wood. I learned this the hard way after my first screen collapsed during a summer storm! For temporary setups, use heavy-duty garden stakes spaced every 3 feet maximum, and bury them at least 6 inches deep for stability.
Attachment Technique: When attaching fabric in Step 3, resist the urge to pull it too tight—especially with 50% shade fabric. A slight drape prevents heat buildup and allows airflow. For a professional finish, fold the top edge over twice before securing it with zip ties or staples. This creates a clean, finished look while preventing fraying. I also recommend using rust-resistant staples to avoid staining the fabric over time.
Seasonal Adjustments: Remember to adjust your fabric's tension seasonally as mentioned in Step 5. In summer, loosen the fabric slightly to allow more airflow—this prevents heat stress on plants. In winter, you can tighten it to block cold winds. I also check for sagging after heavy rains and re-secure any loose areas. This simple maintenance can extend your screen's life from 3 to 5 years.
Pro Tips for Shade Fabric For Plants
- Here's what nobody tells you about making shade fabric screens that actually last and work beautifully.
- Fabric Selection Matters: For a 4-foot-tall screen, choose shade fabric with a 50% block rating for most plants—this ...
- Support Structure Stability: In Step 2, when installing your support system, don't skimp on securing the frame. For f...
Frequently asked questions
Got questions about using shade fabric for your plants? You’re not alone! Here are some of the most common queries—plus straightforward answers to keep your greenery thriving in those shady spots.
How do I determine the right shade percentage for my plants?
The percentage (e.g., 30%, 50%, 90%) refers to how much sunlight the fabric blocks. Delicate plants like ferns or calatheas thrive with 30–50% shade, while tropicals (e.g., hibiscus, citrus) need 50–70%. Succulents and cacti? Stick to 10–30%—they’re sun-worshippers! Check the fabric label for guidance, or mimic your plant’s natural habitat.
When is the best time to install shade fabric for seasonal changes?
Install fabric before peak sun in spring or early summer—usually April to May in most climates. For winter protection, add it in late fall (October–November) to shield plants from harsh winds or frost. Pro tip: Adjust height as plants grow to maintain optimal coverage. Remove it in fall if using temporarily to avoid trapping heat.
Can I reuse shade fabric year after year, or does it degrade?
Yes! High-quality shade fabric (like polyester or UV-stabilized polyethylene) lasts 5–10 years with proper care. Clean it annually with a mild soap solution and rinse thoroughly. Avoid harsh chemicals or bleach—they weaken fibers. Store it dry and folded to prevent mildew. If it yellows or tears easily, it’s time for a replacement.
What’s a good alternative if I don’t want to use fabric?
No fabric? No problem! Try these DIY solutions:
- Natural shade: Plant taller, shade-tolerant species (e.g., bamboo, tree ferns) near sun-loving plants.
- Sheer curtains: Hang lightweight, breathable curtains (like lace) for 20–40% shade.
- Burlap sacks: Drape over pots for 50–70% coverage—biodegradable and reusable!
- Reflective mulch: Use white gravel or pebbles to deflect light (works best for ground-level plants).
For heavy shade, consider a removable lattice with climbing plants like ivy or jasmine.
Why are my plants still struggling under shade fabric—what could be wrong?
Even with fabric, issues like poor airflow, overwatering, or pests can sneak up. Check these fixes:
- Ventilation: Ensure fabric isn’t pressed tight against leaves (lift edges for airflow).
- Watering: Shade reduces evaporation—water less frequently but deeply.
- Pests: Fabric can trap moisture, inviting fungus gnats or spider mites. Spray leaves with neem oil if needed.
- Light gaps: If fabric is stretched, sunlight sneaks through. Secure it tightly or layer it.
If yellowing persists, your plant may need more (or less!) light—adjust the fabric or move pots.
Wrapping up and next steps
Shade fabric for plants is a game-changer for reviving dark corners of your garden or home—whether you're nurturing delicate greens or simply craving a stylish privacy screen. 🌿 By blocking harsh light while allowing gentle diffusion, it protects your plants and enhances their growth, all while adding a sleek, functional touch to your space.
Ready to transform those shady spots? Start small—test a single section first, then expand as you see your plants thrive! 🌱 Your next step: Measure your space, pick your fabric, and get crafting!