
Planting
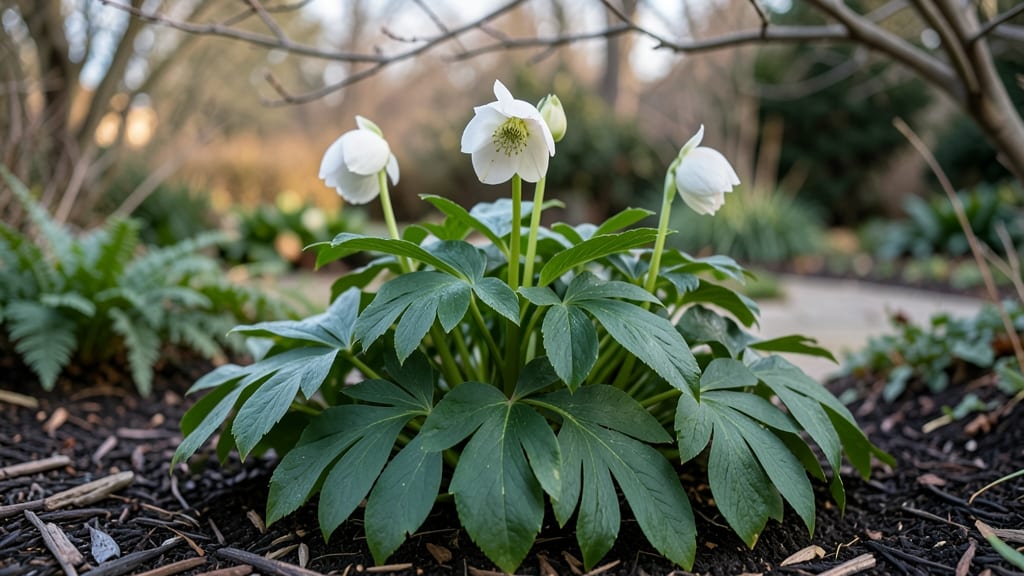
This hellebore shade plant thrives in forgotten corners—evergreen, long-blooming, and stubbornly alive under towering maples and north-facing walls, where it never once complains about the dark. 🌿 Their secret? Thriving where most plants give up.
The key is mimicking their natural woodland habitat: moist, well-draining soil rich in organic matter, and partial to full shade. Plant them in fall or early spring when roots establish easily, and water consistently but avoid soggy soil.
Their leathery leaves stay vibrant year-round, while delicate flowers—often in winter—bring unexpected color. By mid-spring, you’ll see fresh foliage and new blooms emerging, proving shade isn’t a limitation. The plants reward patience with decades of growth, making them a one-time investment for year-after-year beauty.
For troubleshooting, yellow leaves usually mean too much sun or poor drainage, while sparse blooms often signal overcrowding. A little pruning after flowering keeps them tidy and encourages next season’s flowers.
📚 In This Guide
- What you need
- Instructions
- Tips and common mistakes
- Wrapping up and next steps
What you need
- ● Hellebore plants: Choose between: Helleborus niger (Christmas rose, hardy to USDA Zone 4)
- ● Helleborus orientalis (hybrids, Zones 5-9)
- ● Mature plants (1-2 gallon pots) or bare-root bulbs (for spring planting).
- ● Well-draining soil: Mix 1 part compost or leaf mold with 2 parts native soil (or potting mix for containers). Hellebores hate soggy roots!
- ● Organic mulch: 2–3 inches of shredded bark, wood chips, or leaf litter to retain moisture and suppress weeds.
- ● Slow-release fertilizer: 5-10-10 or balanced organic fertilizer (e.g., 1 tbsp per plant at planting time).
- ● Garden trowel or transplant spade (for digging holes 12–18 inches deep and wide).
- ● Gloves (hellebores have mildly irritating sap—protect your hands!).
- ● Watering can or hose with gentle spray nozzle (avoid blasting roots!).
- ○ Optional but helpful: Soil pH tester (ideal range: 6.0–7.0; amend with lime if needed).
- ● Container pots (12–18 inches wide) with drainage holes for patio plantings.
- ● Plant markers (hellebores bloom early—label varieties to track favorites!).
Step-by-step guide to planting and caring for hellebores in shade
Here's how to create a thriving hellebore garden that blooms reliably in the darkest corners.
🪴 Step 1: Select the Perfect Planting Location
Hellebores love dappled shade to full shade—think woodland edges or beneath deciduous trees. Choose a spot with morning sun and afternoon shade for best results. I always test locations by observing how much light reaches the ground at different times of day. Avoid areas where roots might compete with aggressive plants like mint or bamboo.
Look for soil that stays consistently moist but well-draining. Hellebores hate soggy roots but won't tolerate dry spells either. If your soil drains poorly, amend with 2-3 inches of compost mixed into the top 6 inches of soil. This improves aeration without changing the shade conditions they crave.
🌱 Step 2: Prepare the Soil and Plant with Care
Dig a hole twice as wide as the hellebore’s root ball but only as deep as the container it came in. Loosen the roots gently if they’re circling—this prevents root-bound stress. I always add a handful of bone meal to the planting hole for slow-release phosphorus, which encourages strong root growth and vibrant blooms.
Place the plant so the crown sits just below soil level—never deeper than ½ inch. This prevents rot while keeping the plant stable. Backfill with native soil mixed with 1 part compost, firming gently around the roots. Water deeply right after planting to settle the soil and eliminate air pockets.
☀️ Step 3: Provide Consistent Moisture and Mulch
Water once a week during the first growing season, aiming for 1 inch of water per week. You’ll know it’s right when the top 2 inches of soil feel damp but not soggy. Hellebores are drought-tolerant once established, but young plants need steady moisture. I use a soaker hose to water at the base—this prevents fungal issues from overhead wetting.
Apply a 2-inch layer of mulch (like shredded bark or leaf mold) around the base, keeping it 3 inches away from stems. Mulch conserves moisture and regulates soil temperature. Replenish it annually in early spring—this is the secret to keeping hellebores looking lush year after year.
✂️ Step 4: Deadhead and Divide as Needed
Remove spent flower stalks after blooms fade but before seed pods form. This redirects energy to next year’s flowers instead of seed production. I use clean, sharp scissors to snip stems at the base—never tear them. This also prevents the plant from self-seeding where you don’t want it.
Divide hellebores every 3-4 years in early spring or fall. Dig up clumps, separate into smaller sections with 3-5 leaves each, and replant immediately. Overcrowding leads to smaller blooms and weaker growth. I always water divided plants for the first 2 weeks to help roots establish before summer heat arrives.
🌿 Step 5: Protect and Enjoy Year-Round
Hellebores are evergreen, but their leaves may yellow in harsh winters. If this happens, simply trim away damaged foliage in early spring—new growth will emerge quickly. I’ve found that a light dusting of compost around the base in late winter gives them a nutrient boost for spring blooming.
Watch for slugs and snails—they adore young hellebore leaves. I place copper tape around containers or use diatomaceous earth as a natural barrier. With proper care, your hellebores will reward you with months of blooms, often starting in late winter and lasting through spring.
Tips & tricks for perfect hellebore shade plants
Here's what I've learned after years of growing these shade-loving beauties—details that make all the difference.
Location Insight: When evaluating shade spots, observe the area throughout the day—what looks like deep shade in summer might get morning sun in winter. I test locations by placing a white board where I plan to plant; if it stays cool to the touch all day, it's perfect for hellebores. This helps avoid over-exposure that can stress the plants, especially in transitional seasons.
Soil Preparation Secret: The 2-3 inches of compost mixed into the top 6 inches of soil isn't just about drainage—it creates a perfect microclimate for roots. I always sift the compost to remove large chunks that could compact around delicate roots. This loose, airy texture mimics the woodland floor hellebores naturally grow in, which is key to their long-term health.
Planting Depth Technique: Positioning the crown just below soil level (never deeper than ½ inch) prevents rot while maintaining stability. I use a small stick to mark the depth before planting—this visual guide helps me maintain consistency, especially when planting multiple hellebores. Proper depth is critical because these plants are sensitive to waterlogging, and too-deep planting can suffocate the crown.
Mulch Application Strategy: The 2-inch mulch layer should extend 3 inches away from stems to prevent moisture buildup that could cause rot. I use shredded bark because it breaks down slowly, releasing nutrients over time. Replenishing annually in early spring gives your hellebores a fresh start—think of it as their winter blanket that also regulates soil temperature perfectly for their shade-loving nature.
Pro Tips for Hellebore Shade Plant
- Here's what I've learned after years of growing these shade-loving beauties—details that make all the difference.
- Location Insight: When evaluating shade spots, observe the area throughout the day—what looks like deep shade in summer might get morning sun in winter.
- Soil Preparation Secret: The 2-3 inches of compost mixed into the top 6 inches of soil isn't just about drainage—it creates a perfect microclimate for roots.
Frequently asked questions
Got questions about growing hellebores in shady spots?
You’re not alone! Here are some of the most common queries—and their straightforward answers—to help you nurture these stunning shade-loving plants with confidence.
Can hellebores grow in total shade?
Yes! Hellebores are champions of shade and thrive in partial to full shade (dappled light to deep shadows). They tolerate only 2–3 hours of morning sun, making them perfect for north-facing gardens or under trees. Just ensure they get some indirect light to prevent leggy growth.
When is the best time to plant hellebores?
Plant hellebores in early fall or late winter for the best results. This gives roots time to establish before summer heat. If planting in spring, water deeply and mulch to retain moisture. Avoid transplanting in peak summer—they’re sensitive to stress!
How often should I water hellebores?
Once established, hellebores are drought-tolerant but appreciate consistent moisture in their first year. Water deeply 1–2 times per week during dry spells, aiming for 1 inch of water. Overwatering can cause rot, so ensure well-draining soil.
What pests or diseases should I watch for?
Hellebores are pest-resistant, but watch for slugs, snails, or aphids (especially on new growth). Use beer traps or diatomaceous earth for slugs. Fungal issues like leaf spot can occur in humid conditions—improve airflow and avoid overhead watering.
Can I grow hellebores in containers?
Hellebores adapt well to containers (12+ inches deep), making them great for patios or small spaces. Use well-draining potting mix and a pot with drainage holes. Repot every 2–3 years to refresh soil nutrients.
Wrapping up and next steps
Hellebores are the perfect shade-loving plants for gardeners who crave year-round beauty with minimal fuss. Their resilience, stunning blooms, and ability to thrive in deep shadows make them a standout choice for almost any garden—whether you're a beginner or a seasoned green thumb. 🌿
Ready to transform your shady spots into a lush, evergreen paradise? Start by selecting the right variety for your climate, then get planting! With a little care, you’ll enjoy their magic for years to come.
- Next step: Pick a few hellebore varieties and sketch a simple planting plan for your garden.
- Pro tip: Share your progress with fellow plant lovers—inspiration spreads faster that way! ✨