
Light Requirements
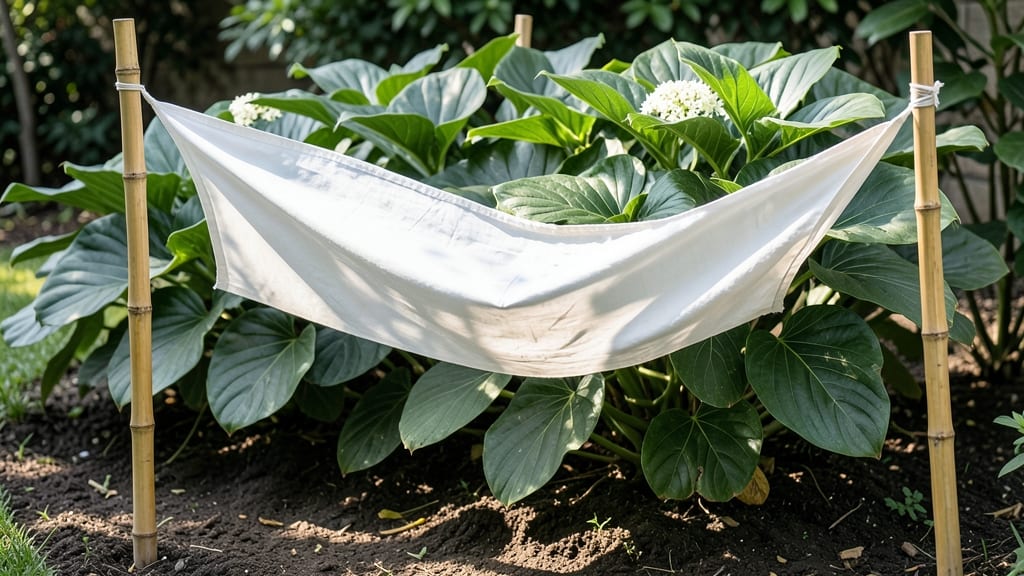
The DIY shade for plants that saved my wilting impatiens became a game-changer—now I craft custom shade for every sun-sensitive plant. 🌿 The beauty is in the flexibility: you can drape fabric over trellises, stretch it between posts, or even... sew your own panels to match your garden’s needs.
No more guessing whether your plants need 30% or 50% shade; you build exactly what they do.
This isn’t about fancy materials—old bedsheets, burlap sacks, or even repurposed window screens work perfectly. The key is securing it properly so wind doesn’t turn your shade into a sail.
I’ve tested everything from zip ties to wooden frames, and even a simple DIY hoop system that costs under $20 for materials. The payoff? Plants that stay vibrant, pests that stay away, and a garden that thrives even in peak sun.
You’ll notice the difference within days: fewer crispy leaves, more lush growth, and a microclimate that keeps roots cool. My favorite part? The creative freedom—whether it’s a floating fabric canopy over herbs or a trellis wrapped in sheer fabric for climbing roses.
The setup takes under an hour once you know the tricks, and you’ll wonder why you ever bought expensive pre-made shade solutions.
Works for containers, raised beds, or full garden sections—adjust the height and density based on what you’re protecting. Here’s how to get started without breaking the bank or your back.
📚 In This Guide
- What you need
- Instructions
- Tips and common mistakes
- Wrapping up and next steps
What you need
- ● Shade cloth fabric: 3–10 oz per square yard (lighter = more sun filtration, e.g., 30–50% shade for delicate plants). Measure based on your garden area.
- ● Measuring tape: For precise fabric cutting (10–20 ft tape is ideal).
- ● Scissors or a utility knife: Sharp tools for clean cuts (fabric scissors work best).
- ● Staple gun + staples: Heavy-duty staples (1/4"–3/8") to secure fabric to frames.
- ● Wooden dowels, PVC pipes, or bamboo stakes: For frame support (1–2" diameter, cut to desired lengths).
- ○ Corrugated plastic or metal hoops: Optional for arched shades (1–2 ft diameter).
- ● UV-resistant spray: Extends fabric life (apply after assembly).
- ● Grommet kit: For easy hanging if using a trellis or overhead structure.
- ● Twine or zip ties: To reinforce edges or attach to stakes.
- ● Reflective tape: Adds extra light control for high-intensity sun.
How to make custom shade cloth for sun-sensitive plants
Here's my go-to method for creating adjustable shade that protects plants while letting in just the right amount of light.
🪴 Step 1: Measure and Cut Your Base Frame
Start by measuring the area you need to shade—whether it's a raised bed, potted plants, or garden sections. For a 4-foot by 6-foot frame (enough for 4 standard raised beds), cut 2×4 lumber into two 4-foot lengths and two 6-foot lengths. This creates a sturdy rectangle that won't warp over time. Use a saw to make clean cuts, and sand any rough edges to prevent snagging your shade cloth later.
Assemble the frame with 2-inch deck screws at each corner, pre-drilling holes to avoid splitting the wood. Add 3-foot vertical supports every 2 feet along the length for extra stability. If you're working with taller plants, extend the frame height to 5-6 feet—just make sure the supports can handle wind without bending.
🌿 Step 2: Select and Attach the Shade Fabric
Choose a shade cloth percentage based on your plants' needs: 30% shade for delicate flowers like impatiens, 50% for heat-sensitive veggies like lettuce, or 70% for tropical plants that burn easily. Spread the fabric over the frame, centering it so equal overhang exists on all sides. Secure it tightly with staple guns along the edges, starting in the middle of each side and working outward to prevent wrinkles.
For adjustable shade, use zippered fabric strips along the sides instead of staples. This lets you roll up sections when plants need more light later in the season. Double-check that the fabric lies flat—no sagging or pooling water, which can rot the wood over time.
☀️ Step 3: Add Adjustable Supports and Anchoring
Attach PVC pipes or metal rods to the frame's corners and midpoints to create 4-foot tall legs. This keeps the shade cloth 12-18 inches above plant tops—close enough to block harsh sun but far enough to allow airflow. For windy areas, add guy wires (thin cables) anchored to stakes driven into the ground at 45-degree angles. This prevents flapping in storms and extends the frame's lifespan.
If you're shading potted plants, use retractable cords to hang the shade cloth from an overhead structure like a pergola. This works best for 30-50% shade and lets you adjust height as plants grow. Always leave 6-12 inches of clearance between the cloth and plant leaves to avoid trapping excess heat.
⏰ Step 4: Install and Monitor for Optimal Performance
Position the shade cloth before peak sun hours (around 10 AM) to avoid sudden temperature swings. Check after 3-5 days to see how your plants respond—look for vibrant green leaves (good) versus yellowing or wilting (too much shade). For seasonal adjustments, roll up sides or remove sections entirely when plants need more light, like in early spring or fall.
I like to mark the frame with chalk or paint at the 12-inch height to remind myself where to adjust as plants grow. If you notice spider webs or debris buildup, give the cloth a quick rinse with water—this keeps it breathable and prevents mold. Most DIY shade setups last 3-5 years with proper care.
Tips & tricks for perfect DIY shade solutions
Building your own shade cloth doesn't have to be tricky—these practical tips will help you create a setup that works beautifully for years.
Material Selection: When choosing shade fabric, look for UV-stabilized options that won't degrade quickly in sunlight. I've found that polypropylene fabrics work best—they're lightweight, breathable, and handle moisture well. For extra durability, opt for fabrics with a 5-year warranty, especially if you're shading high-value plants. The 30%, 50%, and 70% shade percentages mentioned in Step 2 are standard, but you can also find 20% for delicate seedlings or 80% for tropicals if needed.
Frame Stability: In Step 1, when assembling your frame, I can't stress enough how important those 3-foot vertical supports every 2 feet are. I learned this the hard way when a gust of wind snapped a frame without them! For windy areas, consider adding diagonal cross-bracing between opposite corners—this creates a triangle shape that's inherently stronger. If you're working with taller plants, use 3-inch deck screws instead of 2-inch for the vertical supports to prevent wobbling.
Adjustable Design: The zippered fabric strips in Step 2 are a game-changer for seasonal adjustments. I recommend using heavy-duty zipper tape (available at fabric stores) that's rated for outdoor use. For potted plants, retractable cords work best when hung from pergolas—choose cords with adjustable hooks so you can easily change the height as your plants grow. The 6-12 inch clearance mentioned is perfect, but I often add a soft cloth strip along the bottom edge to prevent leaves from getting caught.
Long-Term Care: That 3-5 year lifespan mentioned in Step 4 is achievable with regular maintenance. I mark my frames with waterproof paint at the 12-inch height and check it monthly. For cleaning, use a soft broom or leaf blower to remove debris before it accumulates. If you notice the fabric starting to yellow, it's time to replace it—sun damage reduces effectiveness. Store extra fabric rolls in a cool, dry place away from direct sunlight when not in use.
Pro Tips for Diy Shade For Plants
- Building your own shade cloth doesn't have to be tricky—these practical tips will help you create a setup that works beautifully for years.
- Material Selection: When choosing shade fabric, look for UV-stabilized options that won't degrade quickly in sunlight.
- Frame Stability: In Step 1, when assembling your frame, I can't stress enough how important those 3-foot vertical supports every 2 feet are.
Frequently asked questions
Got questions about DIY shade for your plants? You’re not alone!
Here are answers to the most common concerns—whether you're a beginner or a seasoned gardener looking to tweak your setup.
What’s the best material for DIY shade cloth?
For homemade shade, knitted polyester fabric (like old curtains or bedsheets) works well for light filtering. For heavier shade, use burlap sacks or aluminum foil-lined cardboard. Avoid plastic—it traps heat! If you’re crafty, try cheesecloth for delicate plants like ferns.
How long does DIY shade cloth last?
Durability depends on material: Polyester or burlap lasts 1–2 years outdoors, while foil or repurposed fabric may degrade faster (3–6 months). Check for mildew or fraying every few weeks. Replace if it yellows or weakens—your plants will thank you!
Can I use DIY shade for seedlings or just mature plants?
Seedlings are super sensitive to direct sun. Use lightweight fabric (50% shade) or even a white T-shirt draped over a frame for early stages. Gradually increase shade as they grow. Pro tip: Elevate the cloth 6–12 inches above seedlings to prevent rot.
What’s a quick alternative if I don’t have fabric?
No fabric? No problem! Try these last-minute hacks:
- Lace curtains or netting (30–50% shade)
- Cardboard boxes with holes punched for airflow
- White plastic milk jugs (cut and draped for individual plants)
- Bamboo blinds or screens (repurpose old ones!)
Why are my plants still getting sunburn even with DIY shade?
Check these fixes:
- Gaps in coverage? Secure edges with clips or weights.
- Too much direct light? Add a second layer or use darker fabric (70–90% shade).
- Reflective surfaces (like pavement) amplifying heat? Move plants or add a reflective mulch (e.g., white gravel).
Wrapping up and next steps
Creating your own DIY shade cloth for plants is a game-changer for protecting sun-sensitive greens without breaking the bank! With just a few materials and a little creativity, you can tailor shade solutions to your garden’s unique needs—whether it’s filtering harsh afternoon rays or mimicking dappled forest light. 🌿✨
Now that you’re armed with the know-how, roll up those sleeves and get crafting! Start small—try a single plant or a small section of your garden—to test your DIY shade setup before scaling up. Happy gardening, and may your plants thrive in their perfect, custom shade haven! 🌱💚