
Planting
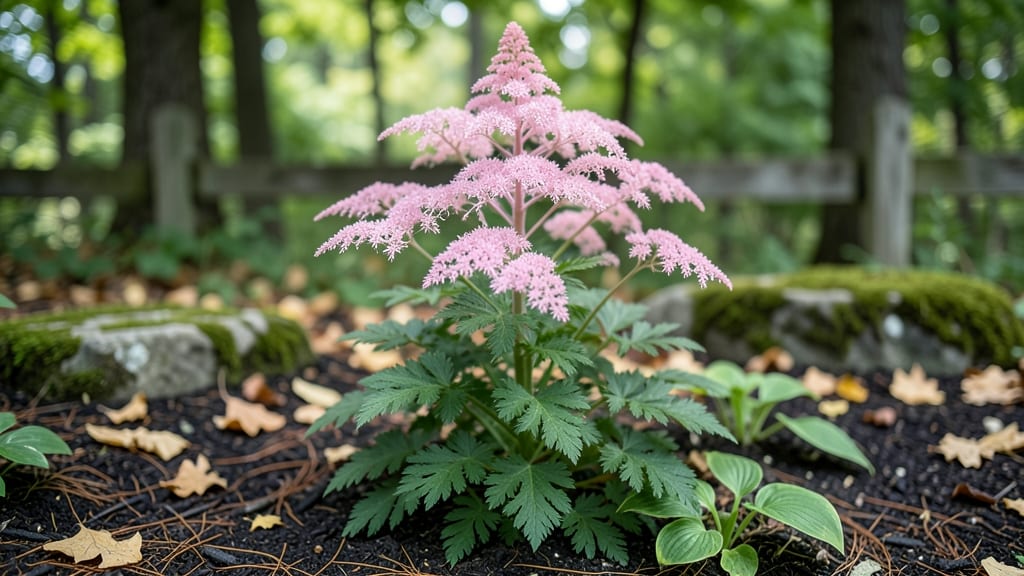
This astilbe shade plant transforms your gloomiest garden corner into a dreamy haven, thriving where others falter with feathery blooms in pink, white, and purple. 🌿 I’ve grown them for years—even under mature trees—and they reward patience with bold, airy texture that lasts from early summer to fall.
The secret to happy astilbe is simple: moist, rich soil and dappled light (they tolerate full shade but bloom best with a few hours of morning sun). Amend heavy clay with compost, and water consistently—these plants hate drying out.
Mulch heavily to keep roots cool and retain moisture, especially in hot climates. You’ll love how they pair with hostas, ferns, and heucheras, creating lush, layered shade gardens. Prune back spent blooms in late summer to encourage a second flush, and divide clumps every 3-4 years to keep them vigorous.
The only real mistake? Planting them in poor-draining soil—that’s a fast track to root rot. Start with bare-root plants in early spring or fall for the best establishment, and watch your shady spots transform. These are the foolproof shade plants every gardener needs!
📚 In This Guide
- What you need
- Instructions
- Tips and common mistakes
- Wrapping up and next steps
What you need
- ● Astilbe plants: 3–5 young nursery-grown plants (choose varieties like Astilbe chinensis or Astilbe simplex for best shade performance).
- ● Well-draining potting mix: 1–2 bags (5–10 cubic feet each) of peat-based or compost-enriched soil (avoid heavy clay).
- ● Organic mulch: 1–2 bags (2–3 cubic feet) of shredded bark or pine needles to retain moisture.
- ○ Slow-release fertilizer: 1 bag (10–20 lb) of balanced 10-10-10 or acid-loving plant fertilizer (optional but helpful for nutrient-poor soil).
- ● Watering can or hose with a gentle spray nozzle: For deep, even watering (aim for 1–1.5 inches per week).
- ● Garden gloves & hand trowel: To protect hands and dig with precision.
- ● Garden fork or spade: For amending soil (rent or borrow if needed!).
- ● Measuring tape or ruler: To space plants 12–18 inches apart (check variety tags for specifics).
- ● Pruning shears (sterilized): For trimming dead foliage post-planting (or early spring).
- ○ Drip irrigation system (optional but handy): Automates watering for busy gardeners.
- ○ Shade cloth (optional): Lightweight fabric (30–50% coverage) to protect young plants from harsh afternoon sun if partial shade is present.
Step-by-Step instructions for planting astilbe in shade gardens
Here's how to create those dreamy, feathery plumes that thrive where most plants refuse to grow.
🌱 Step 1: Choose the Perfect Shade Spot
Astilbe loves partial to full shade, but not deep, dark corners where air barely circulates. Look for spots with 4-6 hours of morning sun or dappled light throughout the day. I always check the ground first—if moss dominates, that's a good sign for astilbe. Avoid areas where water pools after rain, as soggy roots will cause rot.
Test your spot by placing a white plate on the ground at midday. If it stays cool to the touch for most of the day, it's ideal. The key is bright but indirect light—think woodland edges rather than dense forest floors. If your yard has only deep shade, opt for lighter-colored astilbe varieties like 'Deutschland' or 'Fanal' that tolerate lower light better.
🪴 Step 2: Prepare Soil for Lush Growth
Astilbe roots need rich, moist, well-draining soil that stays consistently damp but never waterlogged. Amend your native soil with 2-3 inches of organic compost and a handful of perlite or coarse sand to improve drainage. I like to mix in a slow-release balanced fertilizer (10-10-10) at planting time to give the roots a nutrient boost without burning them.
Dig a hole twice as wide as the root ball but only as deep as the container's height. Loosen the sides of the hole with your fingers to encourage root spread. If your soil drains poorly, create a 6-inch deep mound in the hole's center to help water flow away from the roots. Gently tease apart any circling roots before placing the plant in the hole.
💧 Step 3: Plant and Water Deeply
Position the astilbe so the top of the root ball sits just below soil level—never deeper, or the plant will suffocate. Backfill with native soil mixed with compost, pressing lightly to eliminate air pockets. Water deeply right after planting until moisture reaches 6 inches down. You'll know it's enough when water begins to pool on the surface.
Mulch with 2-3 inches of shredded bark or leaves to retain moisture and regulate soil temperature. Keep the mulch 2 inches away from the stem to prevent rot. Here's the thing—astilbe hates dry soil. After planting, check moisture daily for the first week, watering whenever the top inch feels dry. Once established, they'll tolerate slightly drier conditions, but young plants need consistent moisture to develop strong roots.
☀️ Step 4: Maintain for Stunning Plumes
Feed astilbe in early spring with a low-nitrogen fertilizer (5-10-10) to encourage lush foliage and dramatic blooms. I use half-strength solution to avoid over-fertilizing. Water 1-2 times per week during the growing season, aiming for 1 inch of water weekly. In hot climates, you may need to water more frequently—just check the soil surface before watering.
Deadhead spent blooms by cutting stems back to the next set of leaves after flowering. This encourages a second flush of blooms in many varieties. In late fall, cut back stems to 2-3 inches above ground level and add a 3-inch layer of mulch to protect roots from winter temperature swings. Astilbe is hardy in zones 4-9, but young plants benefit from winter protection in colder climates.
✂️ Step 5: Divide Every 3-4 Years
Astilbe forms dense clumps that benefit from division every 3-4 years to maintain vigor. The best time is early spring before new growth appears. Dig up the entire clump, then separate into smaller sections with at least 3-5 healthy shoots per division. Replant immediately in prepared soil, water deeply, and mulch well.
Here's what I do with extras—I share them with neighbors or pot them up for sale. Dividing also rejuvenates older plants that may have fewer blooms. After dividing, keep newly planted sections consistently moist for the first month to help roots establish. You'll see new growth within 2-3 weeks if conditions are right.
Tips & tricks for perfect astilbe shade plants
These game-changing insights will help you transform your shady garden corners into stunning displays of feathery plumes that last all season.
Lighting Strategy: The 4-6 hours of morning sun mentioned in Step 1 is crucial—astilbe actually prefers this gentle light over harsh afternoon rays. I've found that positioning plants near north-facing windows or under deciduous trees works beautifully. For deeper shade areas, try the 'Fanal' variety—its lighter foliage handles lower light better while still producing dramatic plumes. The key is mimicking natural woodland conditions where these plants thrive.
Soil Science: When preparing your soil in Step 2, don't just focus on drainage—test your soil's pH first. Astilbe prefers slightly acidic to neutral soil (pH 6.0-7.0). If your soil is heavy clay, mix in more perlite (about 50% more than the handful mentioned) to create that perfect airy texture. I've seen plants struggle in compacted soil even when watered properly, so this extra aeration makes all the difference for root health.
Watering Wisdom: The deep watering instructions in Step 3 are non-negotiable, but here's the secret: water in the morning. This gives roots time to absorb moisture before evening evaporation. For container-grown astilbe, I've found they need watering every 2-3 days in summer—check by sticking your finger 2 inches into the soil. If it's dry at that depth, water deeply until it runs out the drainage holes. This consistent moisture is what creates those lush plumes.
Dividing Technique: When dividing every 3-4 years as mentioned in Step 5, focus on the root system rather than just the foliage. Look for divisions with at least 3-5 healthy shoots AND a good network of white, fibrous roots. The old adage "bigger isn't always better" applies here—smaller, well-rooted divisions establish faster. I've had great success with divisions that have at least 3 inches of root spread, even if the foliage looks modest. These will bounce back stronger in their new homes.
Pro Tips for Astilbe Shade Plant
- These game-changing insights will help you transform your shady garden corners into stunning displays of feathery plumes that last all season.
- Lighting Strategy: The 4-6 hours of morning sun mentioned in Step 1 is crucial—astilbe actually prefers this gentle light over harsh afternoon rays.
- Soil Science: When preparing your soil in Step 2, don't just focus on drainage—test your soil's pH first.
Frequently asked questions
Got questions about growing astilbe in shady spots?
You’re not alone! Here are answers to the most common queries about these stunning shade plants to help you cultivate plume perfection with confidence.
What’s the best time to plant astilbe for shade gardens?
Plant astilbe in early spring or early fall for the best results. This timing lets roots establish before extreme heat or cold, ensuring vibrant blooms. Avoid planting in summer—hot weather can stress young plants. If you’re adding to an existing garden, work soil amendments (like compost) into the bed first for optimal growth.
How much water do astilbe shade plants really need?
Astilbe thrives on consistent moisture—think of them as the divas of shade plants! Water deeply 1-2 times per week, especially during dry spells, to keep soil evenly damp (but not soggy). Mulch around the base to retain humidity and reduce evaporation. Overwatering can lead to root rot, so ensure well-draining soil.
Can astilbe grow in deep shade, or do they need some sunlight?
While astilbe tolerates partial shade (2-6 hours of sun), they’ll perform best in dappled or filtered light. Deep, dense shade (like under thick trees) may result in leggy growth or fewer blooms. If your spot is ultra-shady, choose lighter-colored cultivars (e.g., ‘Deutschland’) for better visibility and vibrancy.
Why aren’t my astilbe flowers opening, and how can I fix it?
Flower buds that refuse to open are often caused by stress, such as inconsistent watering, poor soil, or sudden temperature swings. Check for:
- Underwatering (or overwatering)—adjust your routine.
- Heat stress—provide afternoon shade if temps exceed 85°F.
- Nutrient deficiency—feed with a balanced fertilizer in spring.
What are the best astilbe alternatives for full shade?
If astilbe isn’t quite your style, try these shade-loving showstoppers:
Plant
Why It Works
Hosta
Bold foliage, low-maintenance, and thrives in deep shade.
Ferns (e.g., Matteuccia struthiopteris)
Feathery texture, drought-tolerant once established.
Heuchera (Coral Bells)
Stunning foliage colors, compact, and deer-resistant.
Lungwort (Pulmonaria)
Early blooms, spotted leaves, and self-seeds easily.
Wrapping up and next steps
Transforming your shady garden into a vibrant oasis is easier than you think with astilbe! These stunning shade plants bring plume perfection with minimal fuss—just the right soil, consistent moisture, and a little patience.
Whether you’re a seasoned gardener or a beginner, astilbes reward you with bold colors and lush foliage that thrive where others falter.
Ready to elevate your garden? Start small—plant a few astilbe varieties in a shady spot, experiment with companion plants, and watch your garden bloom with confidence! 🌿✨